

How to use Snapshot for data backup and recovery
Snapshot is a tool for data backup and recovery. Use Snapshot to protect data from accidental deletion, application crashes, data corruption, and data loss caused by viruses. Snapshot is based on the Btrfs file system, so when you create an array in TNAS, choose to create a file system in the Btrfs format.
In order to facilitate the user to use and manage Snapshot, we have designed a user-friendly interface for Snapshot in TOS, please refer to the relevant help file guidelines to use Snapshot.
Install the Snapshot application
To install the Snapshot application, go to the TOS Application Center, locate the Snapshot application, and click Install.
Note:
A "snapshot" is a point-in-time copy that records the full state of data at the time the snapshot was taken and stored on the same volume. The snapshot does not take up much additional space and does not affect device performance.
This page allows you to take snapshots, configure snapshot schedules and retention settings. Snapshots minimize hard disk space consumption by preserving specific blocks of data rather than the entire file.
Note:
The snapshot and restore features apply only to shared folders in a file system volume that uses Btrfs.
How to create a Btrfs file system
If you need to create a Btrfs file system, select Btrfs in the file system options when the TNAS system is initialized.
How to change the file system
If your TNAS creates an EXT 4 file system, but you want to use the snapshot feature, you must change the EXT 4 file system to a Btrfs file system.
If you want to change the file system
1. Go to the TOS Desktop > Control Panel > Storage Management > RAID;
2. Select a volume or RAID, then click “More”;
3. Select “File System” from the “More” menu;
4. Check “Change EXT 4 file system to Btrfs file system” in the pop-up menu ;
Note:
Changing the file system is a high risk and may result in data loss. Be sure to back up the data before changing the file system! Changing the file system takes some time. The actual time spent is related to the amount of data in the volume or RAID. Please be patient.
How to take a snapshot
A list of all shared folders in TNAS volume is listed in the Snapshot option. From the list, you can see the size of the shared folder, its location, and the status of the snapshot schedule.
If you need to take a snapshot for a shared folder, open the Snapshot application, select Snapshot option, then select a shared folder from list and click “Take a snapshot”.
How to enable a snapshot schedule
To save you time and allow snapshots to execute automatically, you can enable snapshot scheduling for shared folders and set the cycle, frequency and retention for the snapshot schedule.
If you want to enable a snapshot schedule
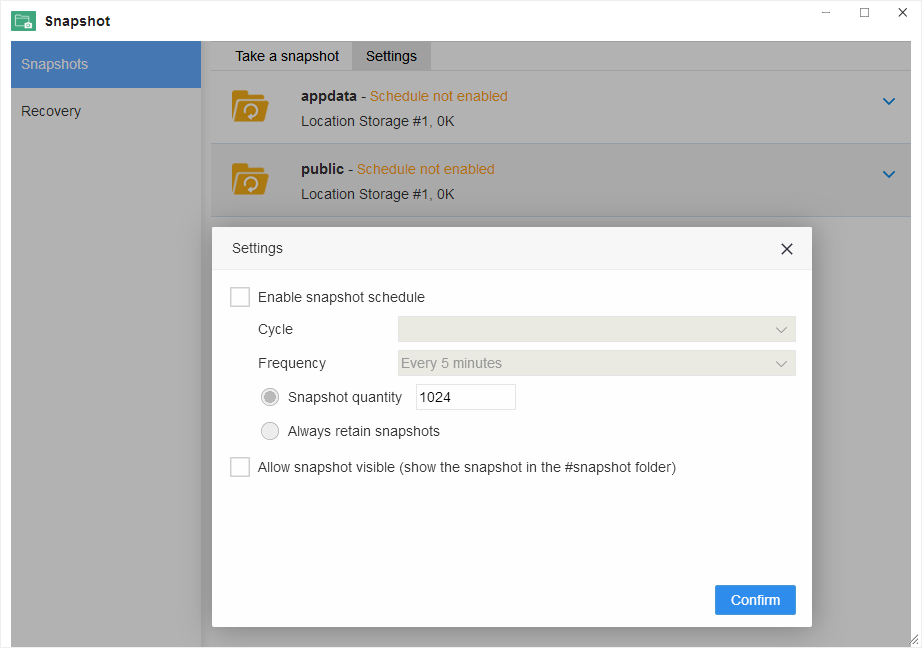
1. Select a shared folder from the Snapshots page and click “Settings”.
2. In the Settings menu, check "Enable snapshot Schedule";
3. Set the cycle and frequency of snapshot execution;
4. Fill in the number of snapshot retention. When the number of snapshots exceeds the limit, the earliest snapshot will be automatically deleted by the system ;
5. Select “Always retain snapshots” if you want to retain all snapshots of this folder. Because there is a limit to the total number of snapshots that can be retained across the system volume, if you choose the “Always retain snapshots” option, it may affect the number of snapshot retention for other folders.
6. Snapshot files will be stored in the #snapshot directory in the same shared folder. If you allow users to view snapshot files, check “Allow snapshot visible” and click OK ;
Note:
Snapshot files cannot be viewed or browsed in an encrypted shared folder.
Snapshot has defined the maximum number of snapshots that can be retained:
1024 snapshots per shared folder (256 or 512 for certain models)
The total number of snapshots in the system is 65536 (or less for certain models).
The recovery option displays a list of shared folders from which you can select a snapshot restore to recover data before an unexpected occurrence. When recovery from a snapshot, you can not only overwrite the entire shared folder with the snapshot taken, but also clone the snapshot without consuming additional storage space so that you can test and verify that the snapshot recovery is working correctly.
How to recover a snapshot
If you want to recover a snapshot
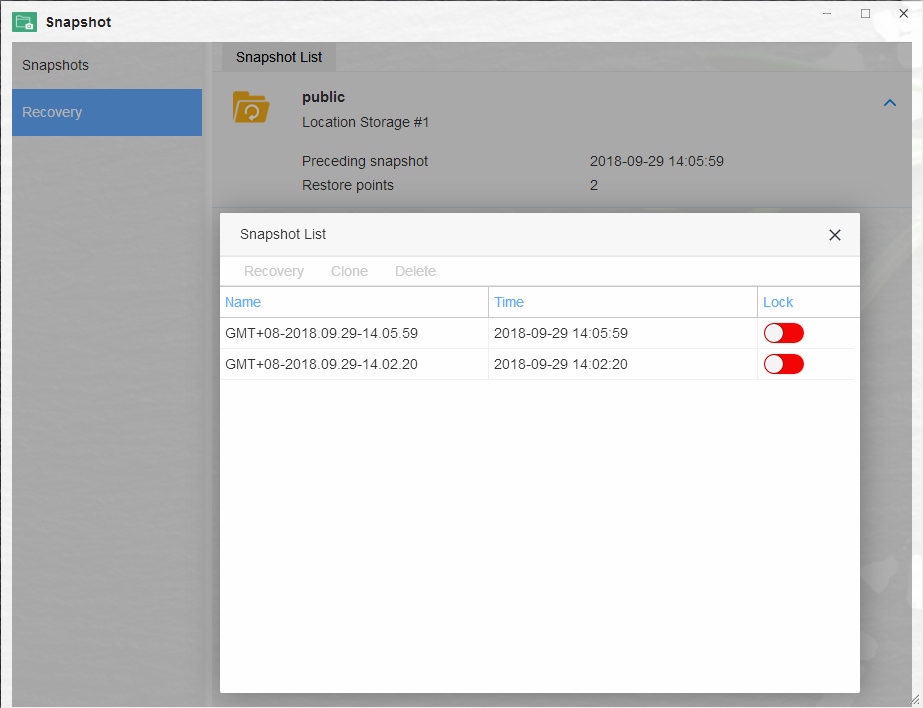
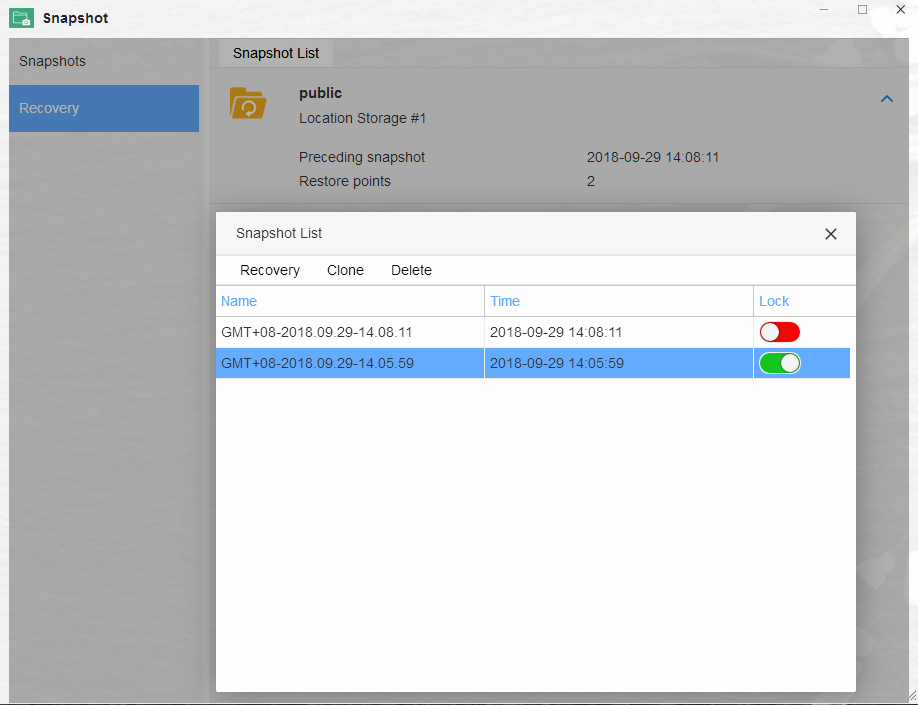
1. Please select a shared folder from recovery option page, then click “Snapshot list”;
2. Select a snapshot from Snapshot list, then click “recover”; The contents of the shared folder are recovered as they were when the snapshot was taken.
How to clone a snapshot
If you want to clone a snapshot
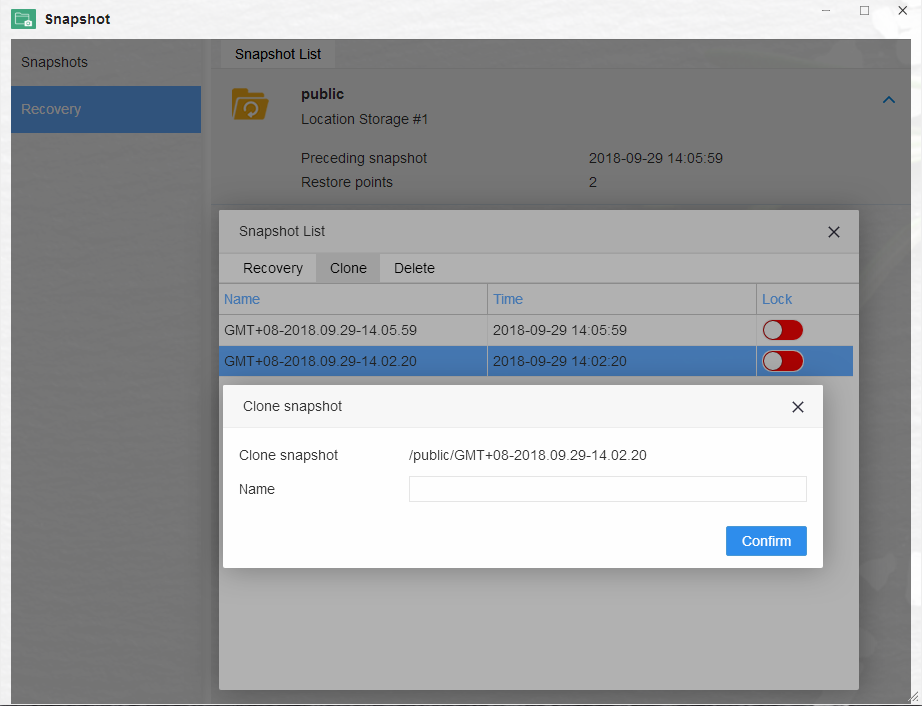
1. Please select a shared folder from recovery option page, then click “Snapshot list”;
2. Select a snapshot from list, then click “Clone”;
3. Enter a new name for the clone snapshot and click OK ; The cloned snapshot will create a new shared folder at home of TNAS ;
How to delete snapshot
If you want to delete a snapshot
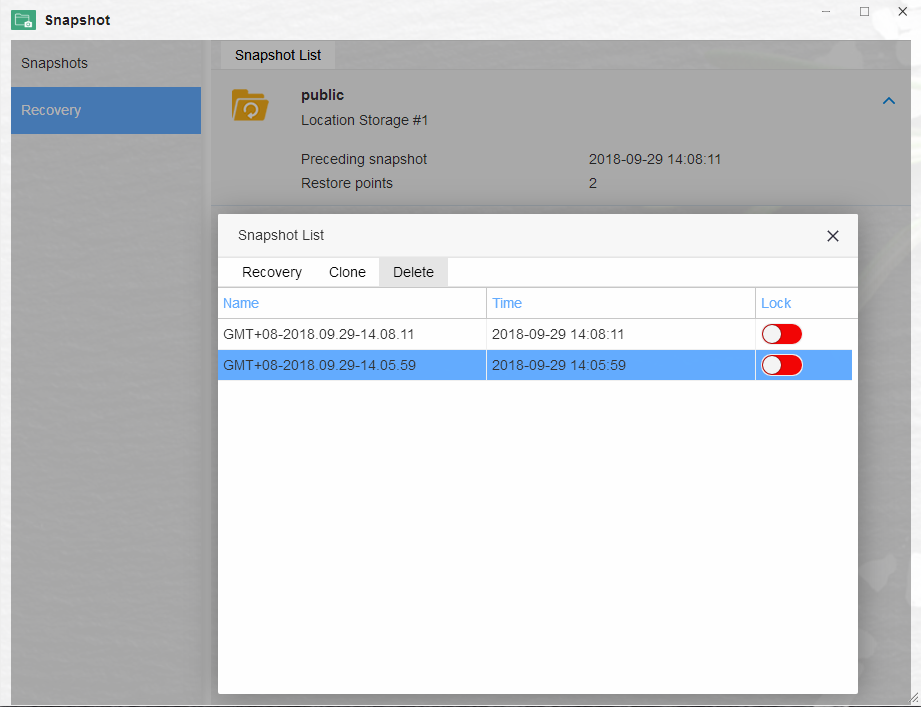
1. Please select a shared folder from recovery option page, then click “Snapshot list”;
2. Select a snapshot from list, then click “Delete”;
3. If you need to delete multiple snapshots at once, press the Ctrl key on your keyboard, then use the mouse to select multiple snapshots that you want to delete, and then click Delete.
Lock snapshots
Older snapshots are deleted when the maximum number of snapshots is exceeded. If you want the snapshots not to be deleted by the system, you can lock the snapshots.
If you want to lock snapshots
1. Please select a shared folder from recovery option page, then click “Snapshot list”;
2. Switch the switch in the "Lock" section to the green position. When the switch shows red, the lock function is off ;
Note:
Limitation to encrypted shared folder
A snapshot recovery cannot be performed on a mounted encrypted shared folder. Unmount the encrypted shared folder before performing the recovery;
A snapshot clone cannot be performed on a mounted encrypted shared folder.