


서비스
How to configure TNAS as a Time Machine server?
1 Sep 2020 | mdl
You can configure TNAS as a Time Machine server, thus enabling Mac users to back up data to TNAS.
If you want to view the backup list, please go to TOS Desktop> Backup> Time Machine> Backup List. You can check the backup data size, date, and delete the backup file. If you want to delete a backup, check the backup name and click "Delete".
To Set Up Time Machine:
1.Go to TOS Desktop> Backup> Time Machine> Settings;
2.Check "Enable Time Machine";
3.Set "Backup Path";
4.Enter the storage space limitation for Time Machine . If you need more space, you can enter 0 (indicating no limitation);
5.Set "Authorised User". Users who are not on the "Authorised User" list will not be able to use this feature;
6.Click "Apply".
If you want to view the backup list, please go to TOS Desktop> Backup> Time Machine> Backup List. You can check the backup data size, date, and delete the backup file. If you want to delete a backup, check the backup name and click "Delete".
Note:
1.Factory settings have Time Machine disabled by default;
2.Backup Path: This refers to the folder allocated to Time Machine backup;
3.Authorised User: Only authorised users have the right to use the backup function of the TNAS Time Machine.
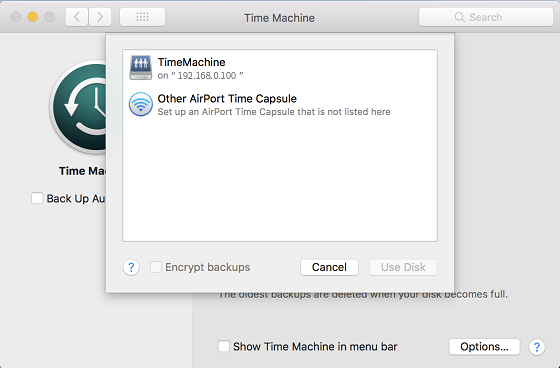
To Set Up Time Machine on your Mac:
1.Open System Preferences on Mac Desktop> Time Machine;
2.Select TNAS as the backup disk;
3.Select "Registered User" at "Connect As", then enter your TNAS username and password.


댓글 5개
when will there be a setup to allow Time Machine backup over SMB as of now AFP is no longer supported? Thank you, Paul
My f2-210 is still under warranty and doesn’t work with Time Machine anymore. You need to find a solution. Your customer service is very poor.
This doesn’t work on f2-210
Same problem as above. Apple is dropping support for AFP. Notified today.
I can’t get Time Machine to work over SMB; it always insists on using AFP. Apple is dropping support for AFP soon and requiring Time Machine over SMB. Will you fix this?